In many areas, experiencing a flooded car is an unpleasant reality of the rainy season. When the moisture makes it’s way within the carpeting, upholstery and underlying padding of a car’s interior it is often challenging to dry before an odorous mildew takes hold of the automobile.
Fortunately, there are several household remedies that can be performed to remove the moisture and return the car’s interior to normal. By following some of the below suggestions, your car will be smelling fresh without a hint of mildew musk.

Deodorizing Solutions for a Flooded Car
1 Blot Dry Moisture
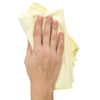 The first step that is required is to remove the moisture from the car’s interior. In many cases this can be effectively performed by blot drying the car with several clean dry towels. When blot drying, be sure to press with the entire force of your body to ensure that the moisture is effectively drawn out.
2 Run a Dehumidifier
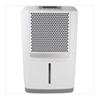 If blot drying leaves remaining moisture within hard-to-reach locations, you can rent a dehumidifier and run it within the confines of your car. These tools are excellent at removing moisture from confined spaces and maintaining an inhospitable environment for mildew. As a note of caution, be sure to read the instructions of your particle dehumidifier before running within your automobile.
3 Spray White Vinegar
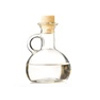 This household substance has anti-fungal properties and is highly effective at cutting through mildew odors within upholstery and padding within the automobile. Mix a solution on one part white vinegar to three part water within a spray bottle. Proceed to spray down the entire interior of the car, paying close attention to moisten the areas which have been most affected by the the mildew infestation. To hurry the evaporation process, leave windows cracked for 3-4 days after spraying the interior of the car down.
4 Spray Tea Tree Oil
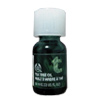 This slightly more expensive alternative works in the same fashion as white vinegar. Tea tree oil also carries anti-fungal properties and works well in eliminating the mildew at the source. As an additional benefit, many believe that this substance will leave less odor within the car during the drying process than using a solution of white vinegar. To use, mix a solution of one part tea tree oil with ten parts water within a spray bottle. Once created, spray down all affected areas of the carpeting, upholstery and padding with a heavy coat of of this mixture. To speed the drying process, crack the windows of the car for 2-3 days proceeding this step.
5 Sprinkle Baking Soda
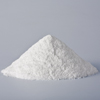 This kitchen ingredient has been used for generations for it’s natural odor absorption capabilities. After neutralizing much of the odor within the car, this powder can be sprinkled over the affected carpeting and upholstery to contain any remaining musk left over from the mildew. Be sure to provide a minimum of 3-7 days for the baking soda to work it’s magic in absorbing the any remaining musty smells.
6 Run an Ozone Machine
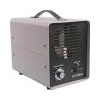 When all efforts seem to be coming up short, a ozone machine can be rented to neutralize and contain any mildew odors that may be lingering within the automobile. These devices are very powerful and effective, but can be deadly if improperly used. Be sure that you have read the product’s instructions in full before using this solution to eliminate odors within the automobile.
7 Seek Professional Help
 If you are short on time or if your personal efforts are not effective, you may want to consider taking your car to professional auto cleaners. These people can be very helpful in breaking down the source of the mildew odor within your car and returning the freshness within the interior of the automobile.
[contact]


 As your first step, you will want to clean all of the contaminants from the freezer with a mixture of hot water and dish soap. Before you begin, you will want to unplug the freezer to liquify any ice remnants which may be harboring the odor. Next, mix two teaspoons of dish detergent with three cups of warm water and proceed dunk a dish rag within the mixture and wipe down the entire interior of the freezer. Make sure that no fish contaminants are left within the freezer before moving on.
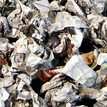 Once the contaminants have been cleared out, you can work in absorbing any of the remaining smells out of the freezer. Stuffing the freezer with crumpled newspaper dipped within vanilla extract is a popular way to remove the odor. Fill a small saucer with vanilla extract and lightly dip the edges of crumpled newspaper into the solution, and place within the freezer. Once the freezer has been filled, close the door and allow 2-3 days for the paper to absorb the unwanted fish odor and replace it with subtle aroma of vanilla extract.
 Citric acid works well at cutting through odors and adding freshness within a confined space. Mix a solution of one part lemon juice with four parts water within a spray bottle. Spray down the entire interior of the freezer and close the door for 6-12 hours. After this time has passed, return to scrub down the interior one final time with hot water to remove any trace of the juice from the freezer’s interior.
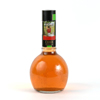 The act of boiling apple cider vinegar and placing it within a freezer may sound strange. However, this household acid works well at combating fish odors within enclosed spaces. Fill a pot with one part apple cider vinegar and three parts water and bring it to a boil. Once the pot has reached a boiling point, pour the steaming contents within an large heat resistant bowl and quickly place within the freezer, making certain to close the door. After 4-6 hours return to remove the bowl and wipe down the vinegar stream from the walls of the freezer.
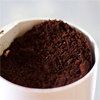 Coffee grounds do more than make a cup of morning brew. They also work well at absorbing odors and replacing enclosed spaces with the gentle scent of coffee beans. First, make sure the freezer is unplugged, and that no moisture exists within the space. Measure one to two cups of coffee grounds and spread them along the bottom of the freezer floor making sure that no area is left untouched. Close door and allow 2-3 days for the coffee grounds to absorb the unwanted fish odor. Once complete, sweep out the coffee grounds and place the freshened freezer back within use.
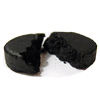 Covering the flooring of the fish ridden freezer with activated charcoal briquettes can do much to absorb the unwelcome smells. Selected 10-12 charcoal briquettes and place them strategically throughout the bottom of the freezer floor. Close the door and provide 5-7 days for the actives charcoal to absorb any remaining fish related organic odors. Once a week has passed, open the freezer door and simply remove the activated charcoal briquettes.
 If placing the freezer outside is an option, doing so will do much in deodorizing the enclosed space. The open space, fresh air and even ultra violet rays of the sun have the effect of neutralizing organic fish related odors and freshening enclosed space. To apply this method, flip freezer face up outside, and open the door so that ultraviolet rays can make their way within. So long as the days remain sunny, leave the freezer like this for 2-3 days before returning to bring the freezer back within the house. As a note of precaution, place a tarp under the freezer while it is outside to prevent dirt and other material from making it’s way within the coils and working parts of the appliance.

 This is a rather simplistic solution which can be effective in most cases of mildew growth within a car. When driving the car, be sure to turn on the air conditioner on full power to ensure that the AC ventilation and interior of the car dries out any remaining moisture that mildew can live from. When not driving the car, be sure to park the car in direct sunlight with the window cracked to allow for additional evaporation of moisture.
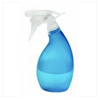 A homemade anti-mildew spray can be created from apple cider vinegar, tea tree oil or grape seed extract mixed with water and a small portion of dish detergent. Mix 4 teaspoon spoon of apple cider vinegar, tea tree oil or grape seed extract, with a half teaspoon of dish detergent and 3 cups of water within a household spray bottle. Once created, spray down the affected areas of the automobile, ensuring that they are sufficiently covered within the solution. As a final step, ensure that windows are cracked to provide for a faster drying timetable. Although all three options are antifungal, apple cider vinegar is far less expensive than opting to use either tea tree oil or grape seed extract.
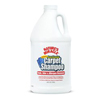 Using enzyme cleaners can go a long way to naturally remove mildew from the interior of an automobile. The activated enzymes eat through odorous mildew and organics which cause freshness and leave freshness behind. Depending on the extent of the mildew infestation, use a enzyme solution on a sliding scale. If it if particularly bad, try pour this solution on the affected area to let it soak in rather than opting to use enzyme spray. After application, it is common to allow 24-48 hours for the solution to soak in before returning to blot dry the product with the affected areas and leaving windows cracked to allow for the solution to dry completely.


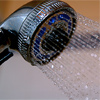 It is important to wash the mat once you get home to avoid the build up of sweat and skin cells from attracting odorous bacteria which could cause the mat to smell. Though time is often tight, a quick rinse off within the shower can go a long ways in maintaining a fresh smelling yoga mat.
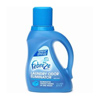 Though many people resist running their mats through the washing machine for fear of damaging their mats, little harm can become of doing so in most cases. When buying your mat be sure to inquire whether they are machine washable, as most yoga mats are capable of being put through a washing cycle. To make an added impact on the wash cycle, use Febreze washing machine detergent to combat odors as well as sanitizing the mat. Though many mats can be cleaned at any setting, wash within a gentile cold cycle if you have any concerns.
 Grape seed extract is another natural compound which contains antiviral, antibacterial and antifungal properties. Mix one part grape seed extract with 12 part water within a generic spray bottle and proceed to spray down the entire outside of the mat. Once performed, hang the yoga mat outside in direct sunlight for 24-48 hours.

 As a guiding principle, you will usually need to deodorize travel coffee mugs with the same heat as the beverage which caused the odor. The odor is usually caused by hot beverages expanding the interior lining of the travel mug and embedding smelly residues within the materials. These transferred residues are much easier to brush out and remove once the interior lining is similarly expanded to provide easy access.
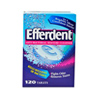 When most people hear the product name “Efferdent”, they immediately think of dentures. However, this product has other deodorizing powers for application beyond devices meant for our grandparent’s gums. Boil 2-3 cups of hot water and fill the entire travel mug with the liquid. Add in 1-2 Efferdent tablets and provide 1-2 hours for them to work their magic. During this time, be sure to leave the lid off. Due to a chemical reaction caused by the tablets, the mug may otherwise explode if the lid were sealed during this process. Once 1-2 hours have passed, pour the substance out and rinse thoroughly before putting back within use.

 One of the reasons that the boots develop an odor is that they are being worn too often. When the same pair of boots are worn daily, a moist environment is maintained that becomes inhabited by odorous bacteria. By giving your bots a day or to air out and dry, you will prevent bacteria developing and will ensure that your boots stay fresh.
 Put Your Boots on IceFreezing your boots might sound like a strange idea, but this practice remains very effective at wiping out the smelly bacteria inhabiting boots. To keep your freezer hygienic, begin by placing both of your boots together and wrapping them within cellophane. Place the cellophane wrapped boots within the freezer and allow for them to sit for 24-48 hours. Once this time has passed, remove the boots and place within the sun for a day to air dry.
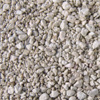 Using clean kitten litter is highly effective at absorbing unwanted odors within boots. It works by immediate creating a dry environment and goes to work at freshening the interior of the boots. Measure a half cup of unused kitty litter ever few days and pour within each boot before going to bed. Be sure to shuffle the boots slightly to make sure that the entire bottom surface of the boots are covered by this absorbent product. Finish in the morning by pouring this compound out of boots and putting them back within use. While using overnight is sufficient in many cases, best results are reached when the kitty litter is left within the boots for an entire 24-48 hours.


 If the vomit has only affected the cushion you will want to carefully remove them from the couch and place them on a clean surface outside. This will ensure that any unwelcome residues do not make their way within the couch’s fiber. The following steps are suggested whether you are cleaning the cushion outside or areas of the couch frame indoors.
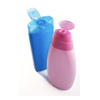 Using a concoction of one teaspoon of shampoo to three cups of hot water will help to further loosen any remaining residues and draw them out of the upholstery and couch cushioning. Similarly pour small portions of this mixture on the affected areas and proceed to blot dry the area to draw the moisture out.
 Using an enzyme cleaner is the best solution to quickly and permanently wipeout remaining acidic odors. This type of cleaning solution can be purchased at pet stores and most large super markets. The active enzymes within the solution go to work in eating through odorous residues and organic materials. Once you have performed the above steps, proceed to pour enzyme cleaner on the affected areas of the couch and provide 24 hours for the solution to work it’s magic. Once a day has passed, blot dry the areas of application and provide 24-48 for them to air dry. When treating a leather couch, be absolutely sure not to use an enzyme cleaner. This substance can cause a negative reaction when applied to this natural fiber.

 By wearing the same pair of ballet flats too often, you will maintain a moist environment that the odorous bacteria will thrive in. By rotating your ballet flats you will give the shoes the opportunity to dry out and deodorize. Purchasing an additional pair of shoes can seem excessive, however it is an effective solution to maintaining fresh ballet flats.
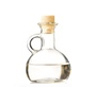 This kitchen ingredient is widely used for neutralizing unwanted odors. Dampen two small towels and place within the interior of each ballet flat. Once performed, allow the ballet flats to sit for 3-4 hours before removing the rags and placing them outdoors to air dry. The vinegar will have the effect of killing any odorous bacteria and placing them outdoors will help to speed the drying process.
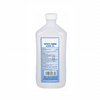 Rubbing alcohol is effective in killing foot odors on the spot. The alcohol sterilizes the interior of the shoes and leaves it smelling fresh. Dampen 4 sheet of paper towels with rubbing alcohol and place two sheets at the end of each ballet flat. After 2-3 hours have passed, remove the sheets from the end of the shoes and allow 1-2 hours to air dry.

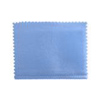 If you need to remove odor from a mystery metal, the safest way to deodorize it is by using a jewelry cleaning cloth. Jewelry cleaning cloths work to remove the oxidation that regularly build up and cause old metal odor. Though this may not be effective in all cases, it cannot hurt as the cleaning clothes retail at the low price of 4 dollars. At a minimum, this solution will remove any dullness and leave the jewelry shining brighter.
 This concoction works well at cutting through the musty smells of old jewelry. The dish detergent helps to loosen skin cells while the citric acid cuts through residual odors. Fill a kitchen glass with water, and add a teaspoon of dish detergent and 3 teaspoon of lemon juice. Stir the solution, and submerge the smelly jewelry with the formula. After 5-8 hours remove the jewelry and wash off any residual residue before drying off.
 Old fashion toothpaste works great doubling as a cleaning solution for metal. Using an old toothbrush, scrub the toothpaste within the various nooks and crannies of the metal jewelry. After doing to for 5-10 minutes, rinse clean under the faucet and dry within a paper towel.
 This is a fantastic product solution for cleaning and deodorizing jewelry. A gentle jewelry cleaning solution can be purchased at most drug stores and is a wonderful solution if you are short on time. To use product, simply remove lid and soak jewelry within the liquid formula.
 This may sound too simplistic to be true, however running the glass jars and bottle through the dish washer is often enough to strip them of unwelcome odors. For the maximum impact on the odor, run the glass containers through the dish washer on the machine’s hotest setting. Often, dishwashers are helpful for delivering the high level of heat needed to expand the glass and sweep the smell away.